Carpet Removal and Uplift Guide
Carpet removal can seem like a daunting task for someone who hasn’t done it before. If you fancy getting your hands dirty and doing it yourself, here is our how-to guide to simplify the process and get you ripping up carpet in no time. This guide covers:
- What are the main options for removing and uplifting carpet?
- Tools for carpet removal
- How much do retailers charge to uplift carpet?
- How to remove carpet
- How to remove underlay
- How to remove gripper rods and staples
- How to dispose of your old carpet
- Fitting a new carpet
1. What are the main options for removing and uplifting carpet?
For advice on how to get rid of your old carpet, check our carpet disposal guide. But before you dispose of it, you need to pull it up. If you don’t fancy doing it yourself, the main options are 1) ask the retailer that sells you your new carpet (they often offer a rip up service for a fee), 2) ask the fitter that fits your new carpet (they also often offer an uplift service for a fee), or 3) pay a waste contractor to not only dispose of the old carpet, but also rip it up. This guide is for those of you that want to save money and do the uplift yourself. Note – it only covers carpet. For hardwood flooring, we recommend your read this guide and for laminate flooring, try this guide.

Before you start tearing up your carpet, there are a few tools you’ll need:
- Utility knife
- Dust mask (this can be a dirty, dusty job)
- Pliers
- Gloves
- Duct tape
- Crowbar
Btw, B&Q’s website suggests the total cost of the above tools is £25.60 (as of September 2019).
The UK’s largest carpet retailer, Carpet Right, charges £3.74 per square meter to uplift and dispose of carpet. An average UK living room is 17 square metres which would therefore cost around £64 for Carpet Right to remove it. Bear in mind Carpet Right only offers this service to customers who buy their new carpet from them. So if you are planning to buy your new carpet from someone else, you’ll have to find an alternative solution or do it yourself.

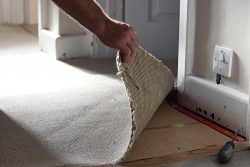
First, go to a corner of the carpeted room and try to pull up the carpet using pliers. If it doesn’t pull away easily, use a utility knife to cut a small square (around 6 by 6 inches) out of the corner of carpet to get hold of something substantial to pull. Then pull up the carpet along an entire wall. As you pull up the carpet, we recommend you fold it into strip sections as you go. Once you fold each section, slice along the fold using your utility knife. Ideally, you should wear gloves when doing this, but if you don’t have a pair then be extra careful of your fingers.
Next, roll up the carpet in its sections and duct tape it together. Cutting and rolling the carpet into manageable sections will make carrying the carpet out of the room easier. Trust me, your back will thank you later.
Your carpet should now all be uplifted and rolled into individual sections. The next step is to tackle the underlay.
If you’re lucky, your carpet underlay will be tacked down with staples. It is however sometimes glued to the floor and needs to be removed differently.
To remove stapled underlay, simply pull it up. Just as before with the carpet, cut it into smaller strips and roll it up. Some staples will probably be left stuck into the floor – look to the next step to find out how to remove these.
Underlay that is stuck to the floor is slightly harder. It can be stuck down for a number of reasons: it has been glued; after a period of time it could have bonded to the polyurethane foam; or other substances spilt on the flooring could have made it stick together. To remove the underlay, you’ll need a scraper tool and you should be able to lift and scrape it off. You might need to give it some welly to remove it completely.

Once the carpet and underlay have been removed, there may be some staples stuck in the floor. Remove these individually by pulling them out with pliers or use a crowbar to remove more than one at a time. It’s not difficult to remove them but can be quite tedious. Make sure you pull them all out though otherwise the floor will be uneven when you put a new carpet down.
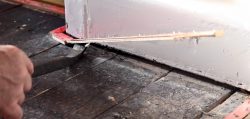
Gripper rods are the thin bits of wood studded with tacks that go around the outside of the carpeted area. They may be in good condition, however if they’re rusty it’s normally a sign of water damage and you’ll have to remove and replace them. To do this, slide a crowbar under the nails holding the strip to the floor and lift up the strip. If it doesn’t lift up easily, hit the crowbar with a hammer to get it loose.
Carpet fitters will put new gripper roads in if they’re fitting a new carpet so there’s no need to worry about replacing them yourself. However, if you are fitting them yourself, leave a gap of about 7mm between the skirting boards and the gripper rod and hammer them down (with the pin side facing the floor).
If you’re having a tile, hardwood floor or laminate floor fitted instead of new carpet, remove the gripper rods because these won’t be needed.
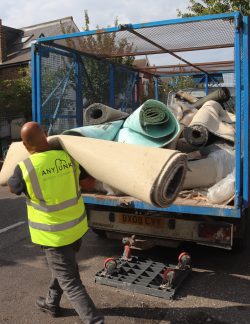
There are a number of ways to dispose of your old carpet. These include reuse, donation, paying your fitter/retailer to get rid of it, taking it to the local dump yourself, engaging a waste contractor, or booking a council bulky waste collection. For a detailed guide to each of these options and which is best for you, please read our carpet disposal guide.

After successfully removing your carpet, you may decide you want to take on your next DIY project: fitting your new carpet. If so, here is a great video from B&Q that explains the process.
Other resources


